Art Generation with stable diffusion
AI is unleashing a new and wide array of opportunities in the creative domain and one of them is text-to-image creative applications.
In this tutorial we will learn how to generate artwork from an input prompt using a pre-trained stable diffusion model. We will use the Habana PyTorch stable diffusion reference model, based on the work done by Robin Rombach et al. in High-Resolution Image Synthesis with Latent Diffusion Models and stable-diffusion repository.
Stable Diffusion is a latent text-to-image diffusion model. It uses a text encoder to condition the model on text prompts. The approach does not require a delicate weighting of reconstruction and generative abilities. This ensures faithful reconstructions while significantly lowering computational costs. This model achieves competitive performance on various tasks such as super-resolution image synthesis, inpainting and semantic synthesis.
How to run the model?
The HabanaAI GitHub repository includes reference scripts to perform text-to-image inference on the stable diffusion model.
Setup
Please follow the instructions provided in the Gaudi Installation Guide to set up the environment. Then clone the github repo and install requirements:
git clone -b 1.7.0 https://github.com/HabanaAI/Model-References
cd Model-References/PyTorch/generative_models/stable-diffusion
git config --global --add safe.directory `pwd`/src/taming-transformers && git config --global --add safe.directory `pwd`/src/clip && pip install -r requirements.txt
Download Model Checkpoint
Download the pre-trained model (5.7GB) used in the original model repository https://github.com/pesser/stable-diffusion and review and comply with any third-party licenses.
mkdir -p models/ldm/text2img-large/
wget -O models/ldm/text2img-large/model.ckpt https://ommer-lab.com/files/latent-diffusion/nitro/txt2img-f8-large/model.ckpt
Generate images
Use the txt2img.py script provided in the scripts directory. For description of command line arguments, please use the following command to see a help message:
python3.8 scripts/txt2img.py -hThe command below will run the pretrained checkpoint on Habana Gaudi and will generate images based on the given prompts. Note that batch size is specified by n_samples:
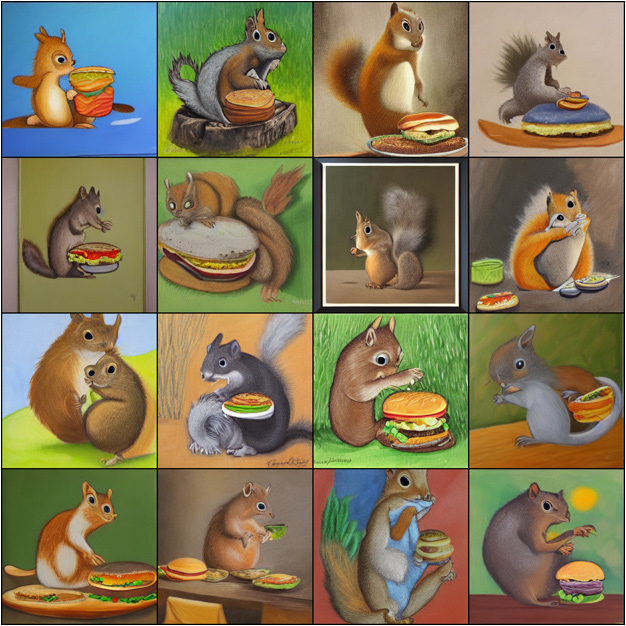
python3.8 scripts/txt2img.py --prompt "a painting of a squirrel eating a burger" --ddim_eta 0.0 --n_samples 16 --n_rows 4 --n_iter 1 --scale 5.0 --ddim_steps 50 --device 'hpu' --precision hmp --use_hpu_graphYou should observe a similar output as below:
Loading model from models/ldm/text2img-large/model.ckpt
LatentDiffusion: Running in eps-prediction mode
DiffusionWrapper has 872.30 M params.
making attention of type 'vanilla' with 512 in_channels
Working with z of shape (1, 4, 32, 32) = 4096 dimensions.
making attention of type 'vanilla' with 512 in_channels
hmp:verbose_mode  False
hmp:opt_level O1

Your samples are ready and waiting for you here:
outputs/ex8
Sampling took 89.71836948394775s, i.e. produced 0.18 samples/sec.
Enjoy.
Code language: JavaScript (javascript)
The image will be saved in the local folder:
“a painting of a squirrel eating a burger”:
And a second example:
“a sunset behind a mountain range, vector image”:

More examples:
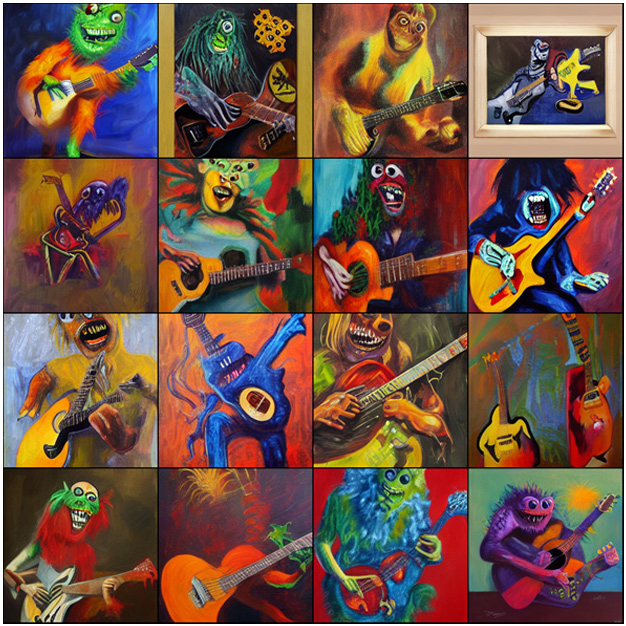
“a virus monster is playing guitar, oil on canvas”:
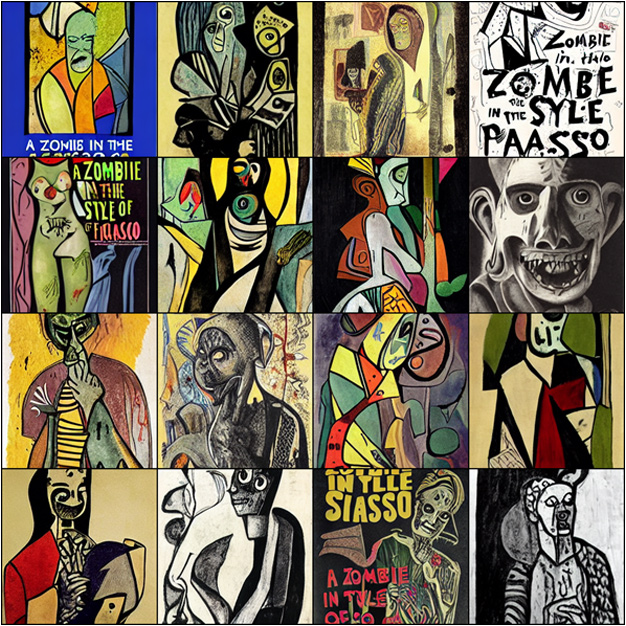
“a zombie in the style of Picasso”:
HPU Graph API and Performance
When working with lower batch sizes, kernel execution on Gaudi (HPU) might be faster than op accumulation on CPU. In such cases, the CPU becomes a bottleneck, and the benefits of using Gaudi accelerators are limited. To solve this, Habana offers an HPU Graph API, which allows for one-time ops accumulation in a graph structure that is being reused over time. For more details regarding inference with HPU Graphs, please refer to the documentation.
To use this feature in stable-diffusion, add the –use_hpu_graph flag to your command, as instructed in this example:
Prompt: “a zombie in the style of Picasso”.
Without –use_hpu_graph:
python3.8 scripts/txt2img.py --ddim_eta 0.0 --n_samples 4 --n_iter 4 --scale 5.0 --ddim_steps 50 --device 'hpu' --precision hmp --outdir outputs/ex10 --prompt "a zombie in the style of Picasso"Time to generate images:
Using first-gen Gaudi, sampling took 82.19 seconds, i.e. produced 0.19 samples/sec.
With –use_hpu_graph:
python3.8 scripts/txt2img.py --ddim_eta 0.0 --n_samples 4 --n_iter 4 --scale 5.0 --ddim_steps 50 --device 'hpu' --precision hmp --outdir outputs/ex10 --prompt "a zombie in the style of Picasso" --use_hpu_graphTime to generate images:
Using first-gen Gaudi, sampling took 68.34 seconds, i.e. produced 0.23 samples/sec.
The above command generates 4 batches of 4 images, given the prompt “a zombie in the style of Picasso”. We observe that it took 17% less time to generate images with the same input, when using the flag —use_hpu_graph. You may also notice that it took more time to generate the first set of 4 images than the remaining 3, with the flag –use_hpu_graph. This is because the first batch of images generates a performance penalty. All subsequent batches will be generated much faster.
We use HPU Graph in this file: generative_models/stable-diffusion/ldm/models/diffusion/ddim.py
We add a new function capture_replay(self, x, c, t, capture) and modify an existing function apply_model(self, x, c, t, use_hpu_graph, capture) to capture and replay of HPU Graphs.
Generally, when the flag –use_hpu_graph is not passed, inference on lower batch sizes might take more time. On the other hand, this feature might introduce some overhead and degrade performance slightly for certain configurations, especially for higher output resolutions.
Summary
- We learned how to run PyTorch stable diffusion inference on Habana Gaudi processor.
- We showed image examples generated by the stable diffusion model.
- We also discussed how to use HPU Graphs to improve performance.
What’s next?
You can try different prompts, or different configurations for running the model. You can find more information on Habana stable diffusion reference model GitHub page.
